Volcano Photography - Beginners Guide


Introduction


The following sections are intended to provide guidance for anyone who would like to try volcano photography, in particular at night, themselves. I will try and cover the most important aspects in seperate sections dealing with photographic equipment, basic techniques and safety issues. Some illustrations have been included to show the effect of different techniques.


Photographic Equipment


Which Camera ?


Daytime photography of volcanic activity can be performed with almost any photographic equipment. Fast lenses (i.e. with wide maximum apertures) and cameras that can take quality images with little noise even on higher ISO settings have the advantage that motion of lava fragments may be frozen more easily, yet reasonable results are possible with almost any camera.

This is not the case any more once light levels fall, and most certainly not at night. Here, volcano photography can be regarded as one of the most demanding photographic disciplines in terms of equipment needed to achieve the most outstanding results. The little available light (e.g. provided by the moon) must be gathered as efficiently as possible (using wide-aperture lenses) and cameras are required which show exceptionally low levels of noise and ideally high dynamic ranges. Unfortunately, as only a tiny minority of photographers really require these features, digital camera design is more focussed on provision of ever higher numbers of pixels or on development of more advanced autofokus systems. An exceptionally high potential resolution is however of little use for night photography, since due to optical constraints, wide aperture lenses are not extremely sharp when used at open apertures. This means that even at the center of the image a lense such as the legendary Nikkor Noct 58mm f1.2 will appear extremely soft on a 12MP camera. Image quality in the corners is even worse, as with all lenses. There is no point in having more MP, when even with 12, the lense is the limiting factor. More megapixels will not make the image sharper and will create unnecessarily large image files. These factors should be taken into account when choosing a camera, insofar as this is possible.

What other features should the camera have ? Live-view is crucial. Using live-view, it is possible to focus the camera manually when light levels are low. Autofocus may still work if the moon or a bright star is available as a target, or even incandescent material, yet the ability to focus accurately without autofocus is important and indeed essential when using non-autofocus lenses. The reasons for using such lenses is detailed in the section below. Basically, live-view is set on maximum magnification and a point light source such as a star is used to find optimal focus.

Basically all digital cameras now have RGB histograms available. These should be activated and used. Light measurement during night photography of active volcanoes is critically important, especially as the subject may be emitting significant amounts of light itself. Hence, a compromise between landscape illumination and exposure of brighter areas such as incandescent lava must be reached, preventing excessive burnout of bright areas (especially the reds), but providing enough landscape detail to put the brighter areas in context (a red lava flow on a purely black background is of little interest as a photo). The automatic metering is not reliable at night due to the extremely low light levels. Thanks to digital photo technology it is possible to make a first test exposure (based on an educated guess), then look at the result on the LCD screen, after which adjustments to the exposure can be made in order to optimize the image. This was obviously not possible with analog cameras and was the main reason i rapidly switched to digital. The problem of ash entering the camera body during the regularly needed film changes was the other main reason.


I will not make a particular camera recommendation since models change frequently and factors such as cost need to be taken into account, which means that a recommendation for one person may not be suitable for another. Personally, I have been using Canon equipment for a number of years, although I do use Nikon, Zeiss, Zuiko Olympus and Leica-R equipment for certain situations. This is possible by the use of thin adapter rings that are placed between the camera body and the lense. Not all lenses can however be adapted to all cameras and in most cases the lense will only retain manual functions. It is important to understand that each camera manufacturer has a different distance between bayonet (where the lense is fixed to the camera) and the film or sensor. In Canon cameras, this distance is quite small. In Nikon cameras, this distance is larger. This means that e.g. a Nikon lense can be attached to a Canon body via an adaper that holds the Nikon lense at a correct distance from the Canons sensor. The other way round, adaptation is not possible, since a Canon lense would have to fit inside the Nikon body to have the correct distance to the sensor. Canon cameras can indeed use most non-canon lenses, this being a huge advantage in my eyes. Before trying to adapt a particular lense one should however check the internet for advice, since some lenses may protrude into the body so far that the mirror can hit the back of them.


It is important, whatever camera you use, to take enough batteries along. Long exposures significantly drain camera batteries. I often travel with more than 5 spare lithium ion batteries for my digital cameras. Original batteries are unfortunately prohibitively expensive, yet useable alternatives are available for a number of cameras (quality is however variable). The availability of cheap third-party batteries for a particular camera may be an important factor in choosing a camera body since many bodies cost less than a handful of original batteries.


Lenses


The selection of lenses suitable for a particular trip / volcano may vary. Factors such as weight, risk of theft, likely distance from which the volcano is going to be observed may all be taken into account. Certainly for daytime photography a couple of zoom lenses will be useful, and usually at least one lense with an optical length of 300mm or more should taken so that violent activity can be documented from a safe distance and/or details can be captured. A wide angle lense or fish-eye may be useful for taking photos of e.g. huge craters or calderas. Zeiss Distagon 21mm f2.8 or Nikon AF-S 14-24 f2.8G ED are two of the best wide-angle lenses, yet both very expensive. Numerous cheap alternatives exist which will provide satisfactory results but generally relatively low corner sharpness.

At night, the situation becomes more complicated. Generally, zoom lense design needs to include numerous compromises so that acceptable images can be made at all optical lengths covered. However, especially at maximum aperture, most zoom lenses are optically worse than prime lenses. Also, zoom lenses rarely have wide maximum apertures anyway, with even the best generally not providing apertures of f2.8 or lower. For night photography at volcanoes, apertures of f2 or below are important so that exposure periods do not have to be too long to capture landscape detail (a bit of red on a black background is uninteresting). Short exposures also mean that the stars do not become long streaks and ash-clouds retain some shape. On a moonlit night, a lense set on aperture f2.0 can capture sufficient landscape details to put an eruption into context with under a minute exposure at iso100. Using f1.4 and iso800, it may be possible to expose for only a few seconds. If you havent got a wide maximum aperture lense, you may concentrate more on taking photos at dusk and dawn when there is more available light, but it is sufficiently dark to clearly see incandescence. This also can give a nice blue coloured sky, however, since light conditions are rapidly changing at these times, judging exposure lengths can be complicated.

Differences in lense quality become most apparent at wide apertures. Hence, in order to get reasonably sharp images, it is important to carefully select lenses for night photography. However, one needs to understand that NO lense at f1.2 or f1.4 is as sharp as a good lense at f2.0. This is due to optical constraints. Hence, if it is possible to shut down the aperture slightly without changing the nature of the image significantly, it makes sense to do so to increase sharpness. Also, most lenses show significant optical abberations such as "coma", "LoCA", and vignietting at wide apertures. In brief, coma is an effect seen mainly in the corners of the images where bright point sources of light basically spread to give a winged shape. Loca (or longitudinal chromatic abberation) means that a light source may obtain a coloured ring. This is because not all wavelengths of light are in focus at the same time. Especially problematic is the fact that red (e.g. lava) and white (e.g. stars) may not be sharp at the same time. Vignetting is the darkening of the corners relative to the middle of the image. Optical abberations are becoming more and more apparent due to the increasing resolutions of modern digital cameras which allow critical analysis of lense properties. Nevertheless, many of the best designs suffer from these problems but nevertheless provide high quality images. Further, an interesting subject taken with a poor lense will always beat a boring subject taken with the best lense, just to keep things in perspective.

Some research in the internet will generally provide information on relative lense qualities. To avoid LoCA, truly apochromatic lenses are required. However, whilst the term APO is commonly used in lense names, few lenses are actually designed to effectively suppress LoCA and this does not include any wide angle lenses to my knowledge. The Leica Summicron-R APO ASPH f2 90mm lense is the shortest lense that I know really effective LoCA suppression. Comparison with e.g. the Canon 85mm 1.8 lense, which is itself not a bad lense, shows tremendous differences. At f2, the Canon lense is generally less sharp and it is only possible to get either stars OR lava sharp but not both. The Leica lense achieves very good sharpness of both at f2 due to its APO design. The downside is that the Leica lense costs over 2000 Euros (more than 5x the price of the Canon) even second hand.

Control of coma is also rarely achieved in lense design. Two notable exceptions are the Nikon Nikkor 28mm f1.4 lense and the Nikkor Noct 58mm f1.2 lense. Like the Leica, both had been discontinued by 2010 and achieve prices of over 2000 Euros on ebay. Finding a properly centered copy of the 28mm f1.4 lense is extremely difficult. This is due to the fact that at wide apertures, even a minimal asymmetry in a lense element or in the respective positions of the lense elements will result in irregular sharpness in the corners or slight general loss of sharpness.

Many of the best optical designs are non-autofocus lenses. There is a reason for this. Autofocus mechanisms require moving lense elements which are loose enough to be moved quickly by a small electric motor. This means that there is generally more play (i.e. flexibility) in the position of the lense elements, especially as the lense gets older. Modern designs including image stabilizer systems add further movable elements into the system. An extremely fine optical system cannot tolerate even slight errors in lense element positioning and there is commercially little sense in optimizing a lense design to the extent that lense mechanics limit the optical results achievable. Even where an autofocus lense may be optically superior, it may not consistently display this superiority due to minimal changes in lense element alignments during use. Given that autofocus is not at all important for volcano photography at night, one has a wide variety of possible lenses one may wish to consider, some of which have very reasonable prices. Manual lenses have the additional advantage that they are often lighter and have less electronics that can fail in e.g. damp conditions.


Many useful lenses are only available second hand, e.g. on ebay. Unfortunately, personal experience shows that some ebay sellers willfully get rid of poorly centered lenses in the hope that such problems will go unnoticed. Also, I have experienced several occasions where criminals were clearly using fake offers for rare lenses such as 21mm Zeiss Distagon or Canon 200mm 1.8 to defraud buyers. Extreme caution should be employed if buying expensive lenses online. If adapting lenses from a different manufacturer to your camera by means of an adapter, be prepared to pay a lot for the adapter since (with few exceptions) most cheap chinese adapters I have tested were poorly manufactured and basically useless since they did not have the correct or uniform thickness.


Obviously, the optical length of the lenses required depends on the subject. If you only want to carry one wide-aperture lense, you canĀ“t go completely wrong with a 50mm lense. Cheap wide apertured 50mm lenses (e.g. Canon 50mm f1.8; Zuiko Olympus 50mm f1.4) are available and have at least acceptable or good image quality, respectively (especially if some sharpening is applied in post-processing). Nikon, Canon and Leica have significantly more expensive 50mm designs which provide better optics. Focusing may be difficult at night and is especially critical when working with wide apertures. When there is a full moon, autofocus will normally be able to lock onto it, if infinity focus is required. Alternatively, many modern digital cameras have live-view functionality. This means that the subject may be viewed real-time on the LCD monitor. This allows one to focus the lense whilst viewing the result on the LCD. However, it should be noted that many live-view functionalities do not provide the image in full resolution, thus making exact focussng difficult. Alternatively, one may test the lense before nightfall and make markings indicating where the best focus point for a certain distance is (note: this may also vary with temperature). The manufacturers indications provided on the lense are nowhere near accurate enough. Once you have got correct focus, disable autofocus.


It is very important to remember that lenses, just like camera bodies, do not like volcanic ash. Many of my lenses make scraping noises when i turn the focus ring due to entrapped ash. You cannot protect them all of the time if you want to use them but they should be well wrapped up when not in use (i roll them up in plastic shopping bags), and covered as much as possible with e.g. a cloth when ash is falling. Moisture is a common problem at night since it may collect on lenses once temperatures fall below dew-point. This is extremely difficult to avoid and very disruptive since sharp images can not be made when condensation has settled on the lense. Lense hoods slightly reduce this problem, and it is sometimes useful to use a filter since if this gets wet one may remove it. Certainly the front of the lense (if not the whole camera) should be covered when it is not in use. Drying / cleaning a lense in a volcanic environment should be avoided if possible since only a few grains of ash on a cleaning cloth will severely scratch the lense.


Tripods


If you are on top of a volcano, there is a fair chance that it will be windy. A sturdy tripod is essential and should be only extended as far as absolutely necessary. If the landscape is free of vegetation you will usually not need a tall tripod at all. To save weight, I often remove the bottom leg sections from my tripods and put plastic caps over the exposed bottoms of the middle sections. The center column is best left at home if you can seperate it from the tripod mount. Cameras mounted on extended center columns are very unstable. Carbon tripods are preferred for weight reasons, but are more expensive and get very easily scratched when ash enters the joints. Obviously, to avoid camera shake during shutter release a cable-release (or remote release) is needed. A cable extension is sometimes useful so one can sit comfortably, further away from the camera once it is set up. If your camera allows the mirror to be released before the shutter, then this option should be deployed, unless one needs to be able to shoot a photo immediately (i.e. if one is waiting with the "trigger" poised for an eruption. In high wind conditions, lense hoods should be removed to reduce the surface area of the lense exposed to the wind. Generally it is advisable to use ones body to shield the camera and lense from the wind. In strong winds or when seismic activity is notable, it may not be possible to keep long lenses stable at all.


Basic Techniques


Night Photography


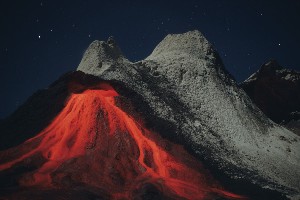
Different types of volcanoes require different approaches. Incandescence (glowing) of fresh lava, such as in lava flows or ejected during strombolian eruptions (where glowing material is thrown out of the crater in often high trajectories) can even be recognized during daylight. Lava domes on the other hand, or the chemically unusual low melting point lava found at Oldoinyo Lengai volcano do not generally glow visibly in daylight conditions and usually require a much longer exposure time. Sometimes, long exposures will reveal incandescence not visible at all to the naked eye.


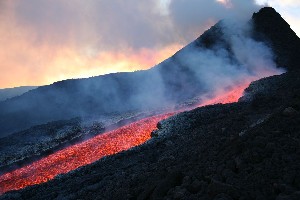
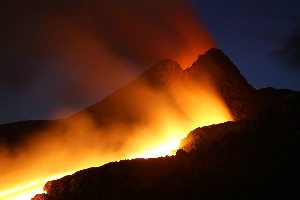
Lava Flows without significant crusting are generally best captured in the evening or early morning when there is sufficient residual light to capture landscape details without completely burning out the flow (or even worse the gas cloud usually found above it). The appearance of the flow can be varied by changing exposure times. Short exposures with wide apertures will obviously freeze any surface structure of the flow, whereas long exposures with shut down apertures will often give the flow a stripy touch. Intense continuous lava fountains can be treated similarly.

Mount Etna Volcano Lava Flow Mount Etna Volcano Lava Flow

Short Exposure of Lava Flow at Etna Volcano, showing surface structure of flow. Taken in the evening (1/60sec f5.6 iso100)

Tripod mounted exposure of same flow at Etna Volcano. Taken in evening (2sec f5.6 iso100). Note that flow is burnt out with no visible surface structure, but angle of shot reduces size of burnt out area and exposure length makes context of flow visible.
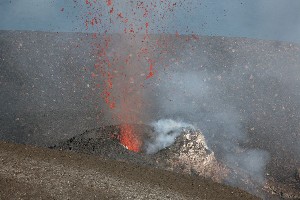
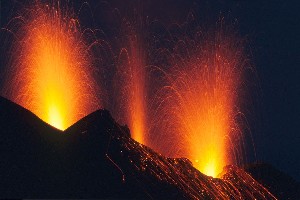
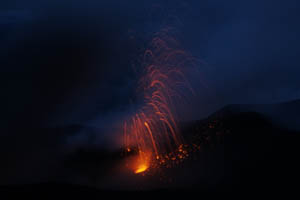
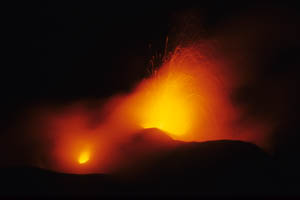
Strombolian eruptions are probably the most widely photographed eruption types. In strombolian eruptions, strongly glowing material is ejected explosively from the volcanic crater and flies in a more or less parabolic path before reaching the ground again. Although the material is strongly glowing, burn-out is not such a major problem, since the volcanic bombs only are in each part of the picture for a fraction of a second. Incandescence is nevertheless sufficient to trace the path of the trajectory during the photographic exposure. The paths of the trajectories can usually even be seen at f8, iso100. It is important to capture the beginning of the eruption, since trajectory paths should not start in mid air. Hence, it is advisable to start the exposure and hope that an eruption will occur during the exposure period. This can take one through a lot of "film" and batteries without an eruption but when it works the best results are achieved.

Stromboli Volcano Strombolian Eruption Stromboli Volcano Strombolian Eruption

What a small strombolian eruption looks like in daylight. The nighttime trajectory images can mislead some non-photographers into thinking that a continuous fountain is being shown. Each parabola is however simply traced by a single glowing lava fragment.

Multiple Strombolian Eruptions captured at night by long exposure technique. Note slight burnout in spite of f8 aperture. Exposure length was about 15min, during which the eruptions occured.


Obviously, digital cameras have a major advantage here as you can basically set them up and leave them running taking series of pictures all night if you have a timer device. On Stromboli volcano (the volcano giving this type of activity its name), the vents glow between eruptions. If there is no wind, volcanic gases collect above the vents and are lit up by vent incandescence. This results in bright red areas with no structure above the vents during long exposures. In this case, one needs more light or a change in conditions to capture the best shots. Another problem is that at the bottom of the eruption "column" the material often has not spread out very much. Consequently, in this area burn-out problems can still be an issue, even at f8, iso100.

If an eruption involves a lot of ash, this may obscure the incandescent material and significantly inhibit night photography.

Stromboli Volcano Strombolian Eruption Stromboli Volcano Strombolian Eruption

Strombolian Eruption where the shutter was released after the eruption had started. Note that the trajectories do not start at their source. This should be avoided.

Stombolian Eruption obscured by volcanic gases hanging around the vent in low wind conditions. Note that landscape cannot be exposed enough as picture already overexposed in center long before any landscape structure could be captured.


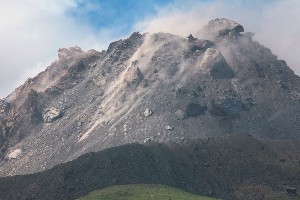
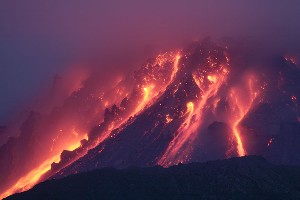
Volcanic Domes are also interesting yet less popular photo motifs. Depending on the structure of the dome and extrusion rate of lava , incandescence may be hardly visible. Occasionally, incandescent material can break off Domes and roll down the flank of the volcano. This can be captured much as a strombolian eruption, with the paths taken by incandescent rocks rolling down the volcano are made visible by the long exposure. Incandescence is however likely to be less strong than in a strombolian eruption. Even when no rockfalls are taking place, an active lava dome glows from cracks and at points of particularly high lava extrusion. Long exposures capturing the dome structure together with the glowing areas can give highly satisfying results. Longer lenses are advisable for lava dome photography , since approaching an active lava dome is generally not advisable.

Soufriere Hills Volcano Lava Dome Soufriere Hills Volcano Lava Dome Night

Lava Dome of Soufriere Hills Volcano, Montserrat, during daylight

Several minute nighttime exposure of the same dome (from a different angle) using a 400mm f5.6 lense with wide open aperture. Dome incandescence and small rockfalls are visible.


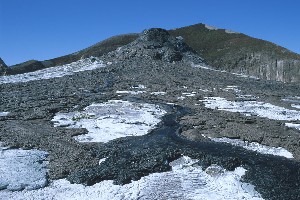
Oldoinyo Lengai volcano. Lava temperature at Oldoinyo Lengai volcano is unusually low, resulting in weak incandescence not visible during daylight. As a rule of thumb, an active lava flow on Oldoinyo Lengai can be exposed for 30secs at f2.0 to give it a strong red colour at an iso100 setting. This time is also a suitable minimum exposure time for the surrounding crater landscape in full moon conditions.

Oldoinyo Lengai Volcano Lava Flow Oldoinyo Lengai Volcano Night Eruption

Daytime view of a lava flow at Oldoinyo Lengai Volcano (Note: no visible incandescence)

Nighttime view of lava flow at Oldoinyo Lengai Volcano. Taken with Canon 50mm 1.8 lense (40sec, f2.0, iso100 film). Note: stars appear as dots, not lines, due to short exposure.


Daytime Photography


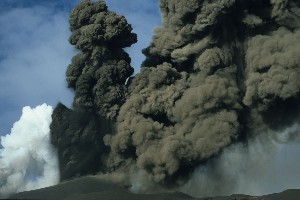
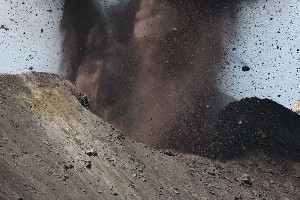
Ash Clouds / Pyroclastic Flows. Nighttime photography of ash clouds / pyroclastic flows is extremely difficult. On moonlit nights it may by possible to retain some structure using short exposure times (i.e. < 5 sec). Both are nevertheless best captured during the daytime. As with all other volcanic phenomena captured during the day, general rules of photography apply which I will not go into here. One or two minor points should be mentioned though. The autofocus of most cameras has difficulty focussing on ash clouds in certain light conditions, since they often lack any high contrast structures. If this problem occurs, it is advisable to focus on a more contrasty object equidistant to the motif (e.g. the edge of the crater against the sky) and then once correct autofocus is confirmed, deactivate the autofocus. Further, if you want to freeze motion (e.g. lava bombs in flight), a short exposure time is necessary (e.g. 1/1000 sec), just as with photography of flying birds. Longer exposures can give a more dynamic but less sharp touch. Simply a matter of taste.

Mount Etna Ash Cloud Eruption Stromboli Volcano Ash Rich Eruption

Ash cloud at Mount Etna, 2006

Unusually ash-rich eruption at Stromboli volcano in 2006. Exposure of 1/1000 sec, sufficient to freeze the motion of the lava bombs. Taken with 400mm lense for safety reasons.


Safety Issues


Clearly, volcanoes are potentially dangerous. You should be aware of volcanic hazards and make sure you get reliable local advice before approaching a volcano. Please do not ignore warnings and unnecessarily put yourself in danger. If necessary, just use a longer lense. It may be better to be further away anyway since you probably wont get much of an overview shot standing right at the base of a high eruption column. Please dont ask me how close you should go as I can not give advice for liability reasons. If you follow a volcanologists advice you will most likely need a very long lense, since they understandably have to err on the side of caution.


Photovolcanica Full Index